X/Y Coordinate Feature In Pro-Stitcher
Today, I am going to explain this x/y coordinate feature in pro stitcher and how this game-changing technique makes things so easy for longarm computerized quilters, when dealing with a complex design such as “Multifarious Dream Big Poinsettia”.
Thanks to Cathie Zimmerman and Adam of “Adam Sew Fun” for introducing the Handi Quilter longarmers with this very handy feature of Pro-Stitcher of placing the designs along X and Y-axis.
You need two things for this to work. Firstly, the designer must digitize the designs with x and y co-ordinates. Secondly it only works with the HQV format designs. If you do not receive the HQV format of the designs, please ask the designer if the designer can provide them in this format. Luckily, I am one of those designers!
Though Adam’s video is quite explanatory, if you need PDF notes, please download the file of this blog.
X and Y axis coordinates are like an address of a place. The values are assigned to place an object in a two dimensional space.
PROCEDURE
I would like to be precise and on the point, So here is what you do
-
If you haven’t downloaded the latest version of Pro-Stitcher, please do that from Handi Quilter’s website. The latest version is 21.07.0537 which was uploaded on HQ site on October 21, 2021. I am using this version and the photos in this blog are from this version.
-
After opening the Pro-Stitcher, go to the tab “File” click on “Design” and “Open”. Open the design that you are going to quilt. For demonstration purposes, I will be using the “Multifarious Poinsettia Holiday Panel” design.
-
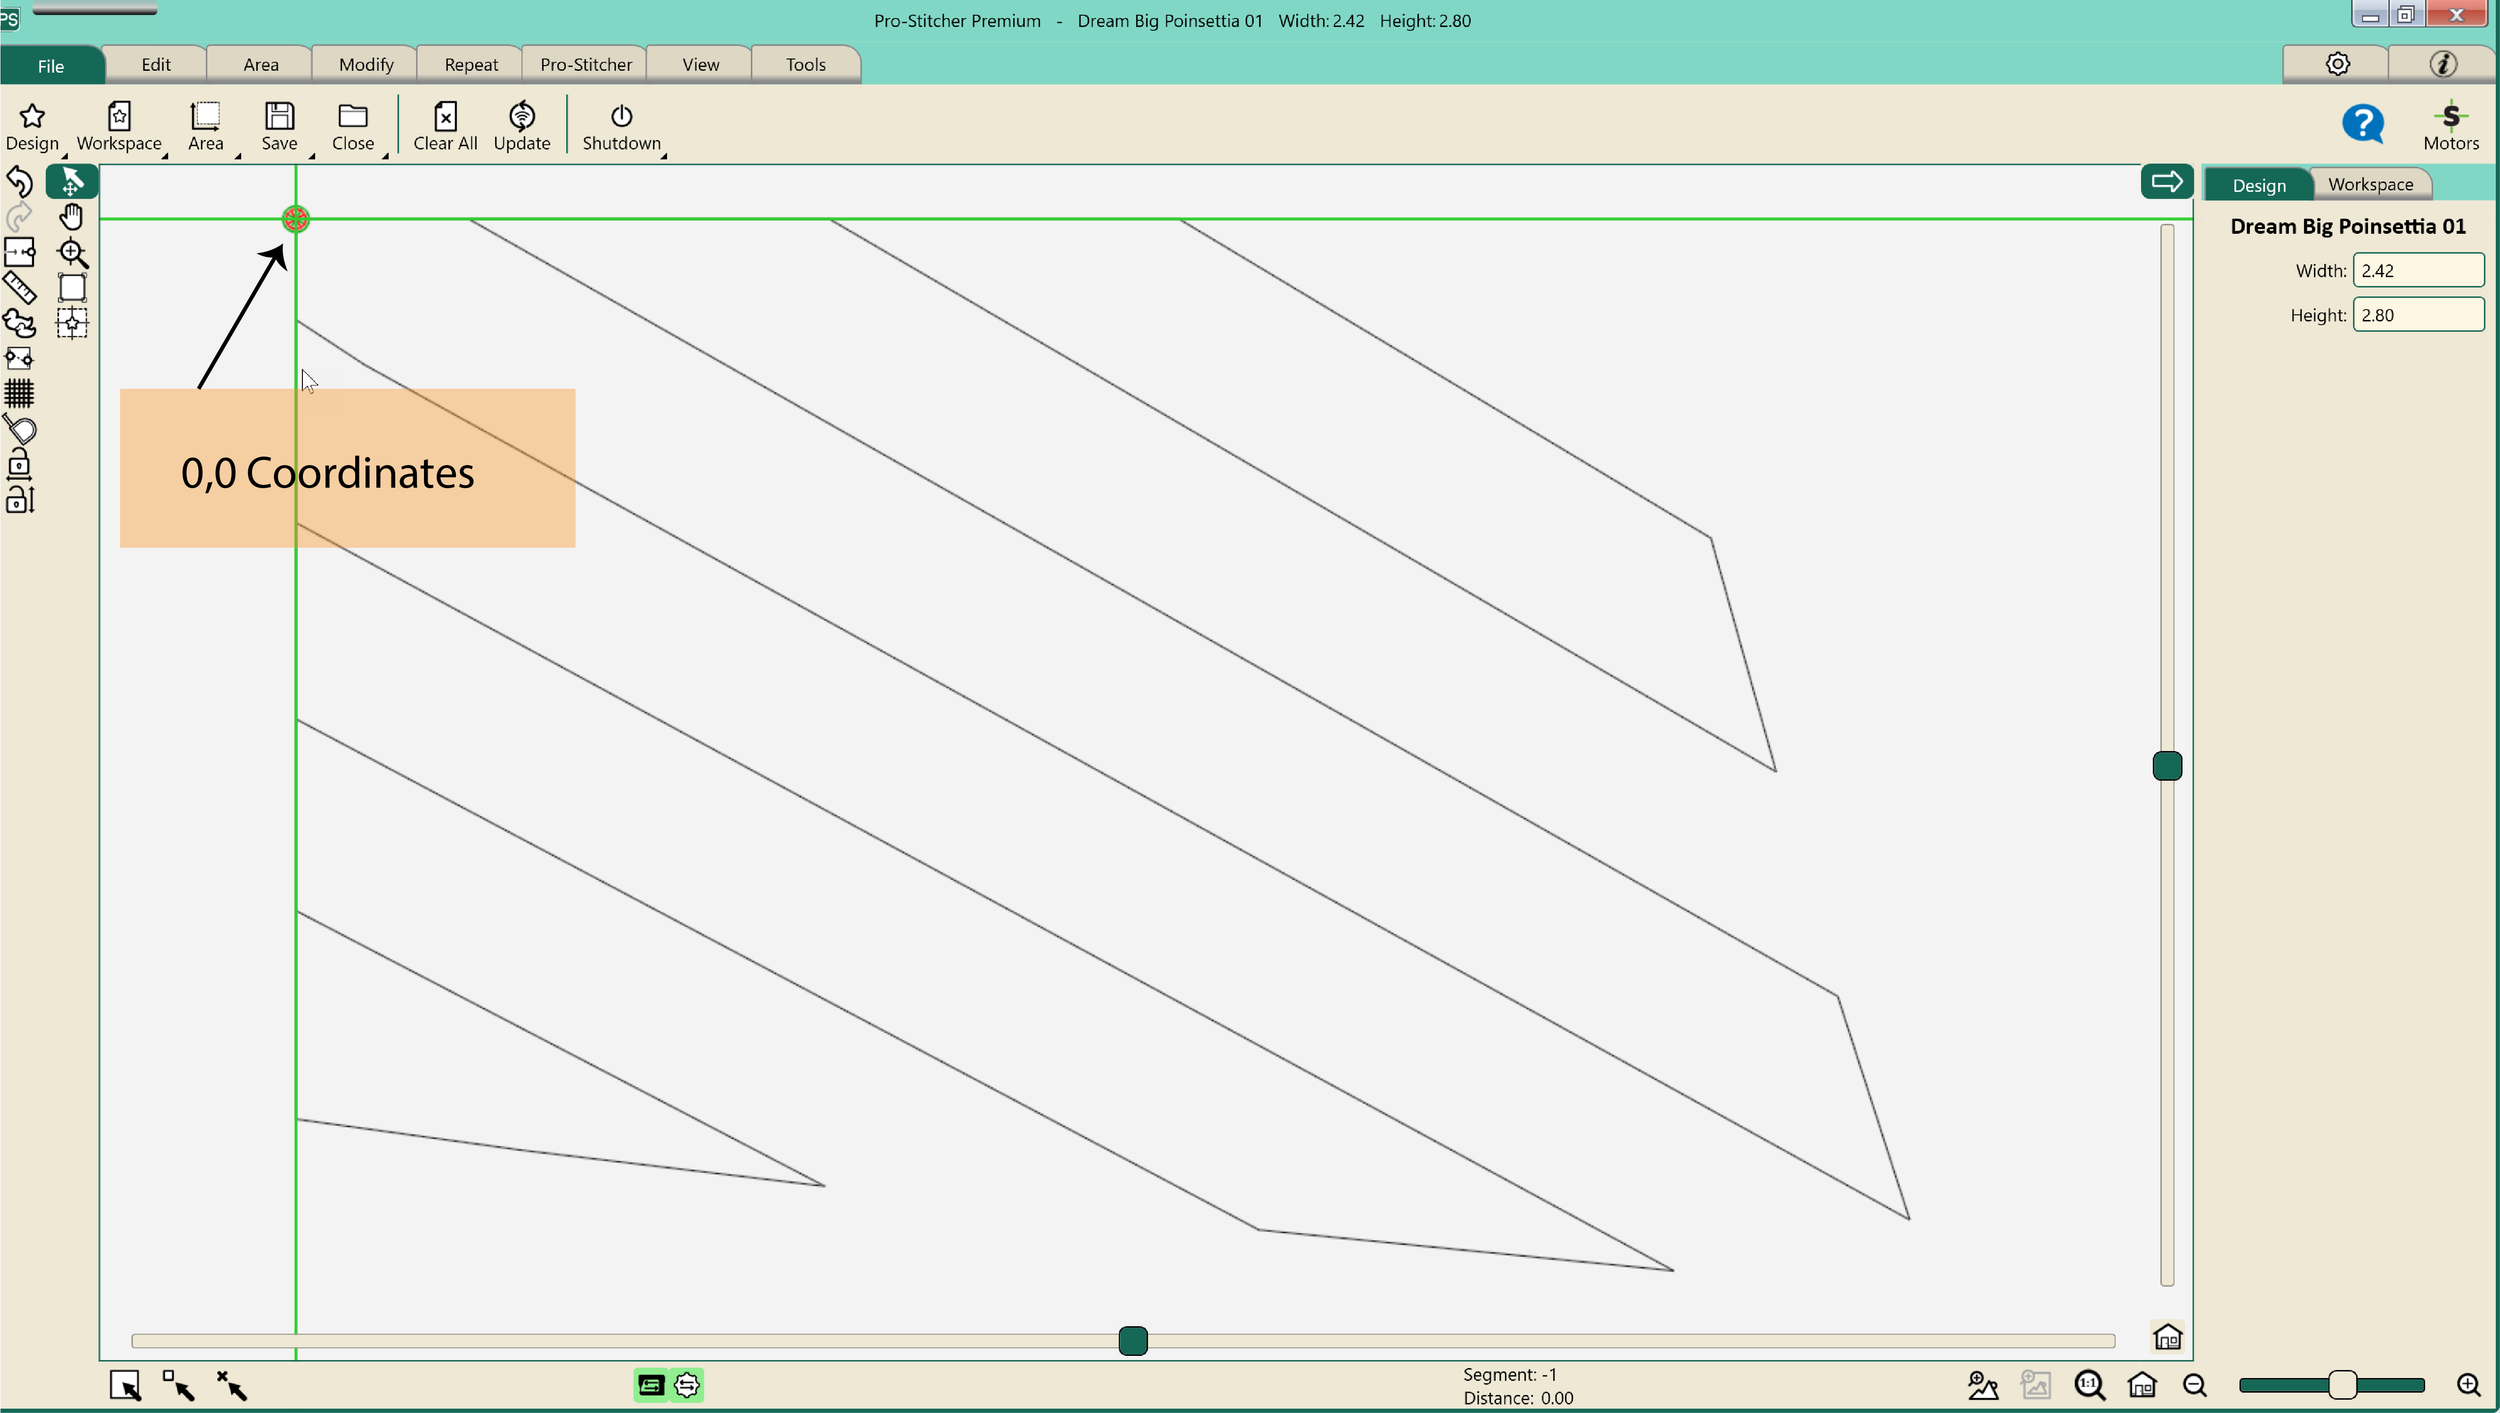
The design opens and falls inside the crosshairs.
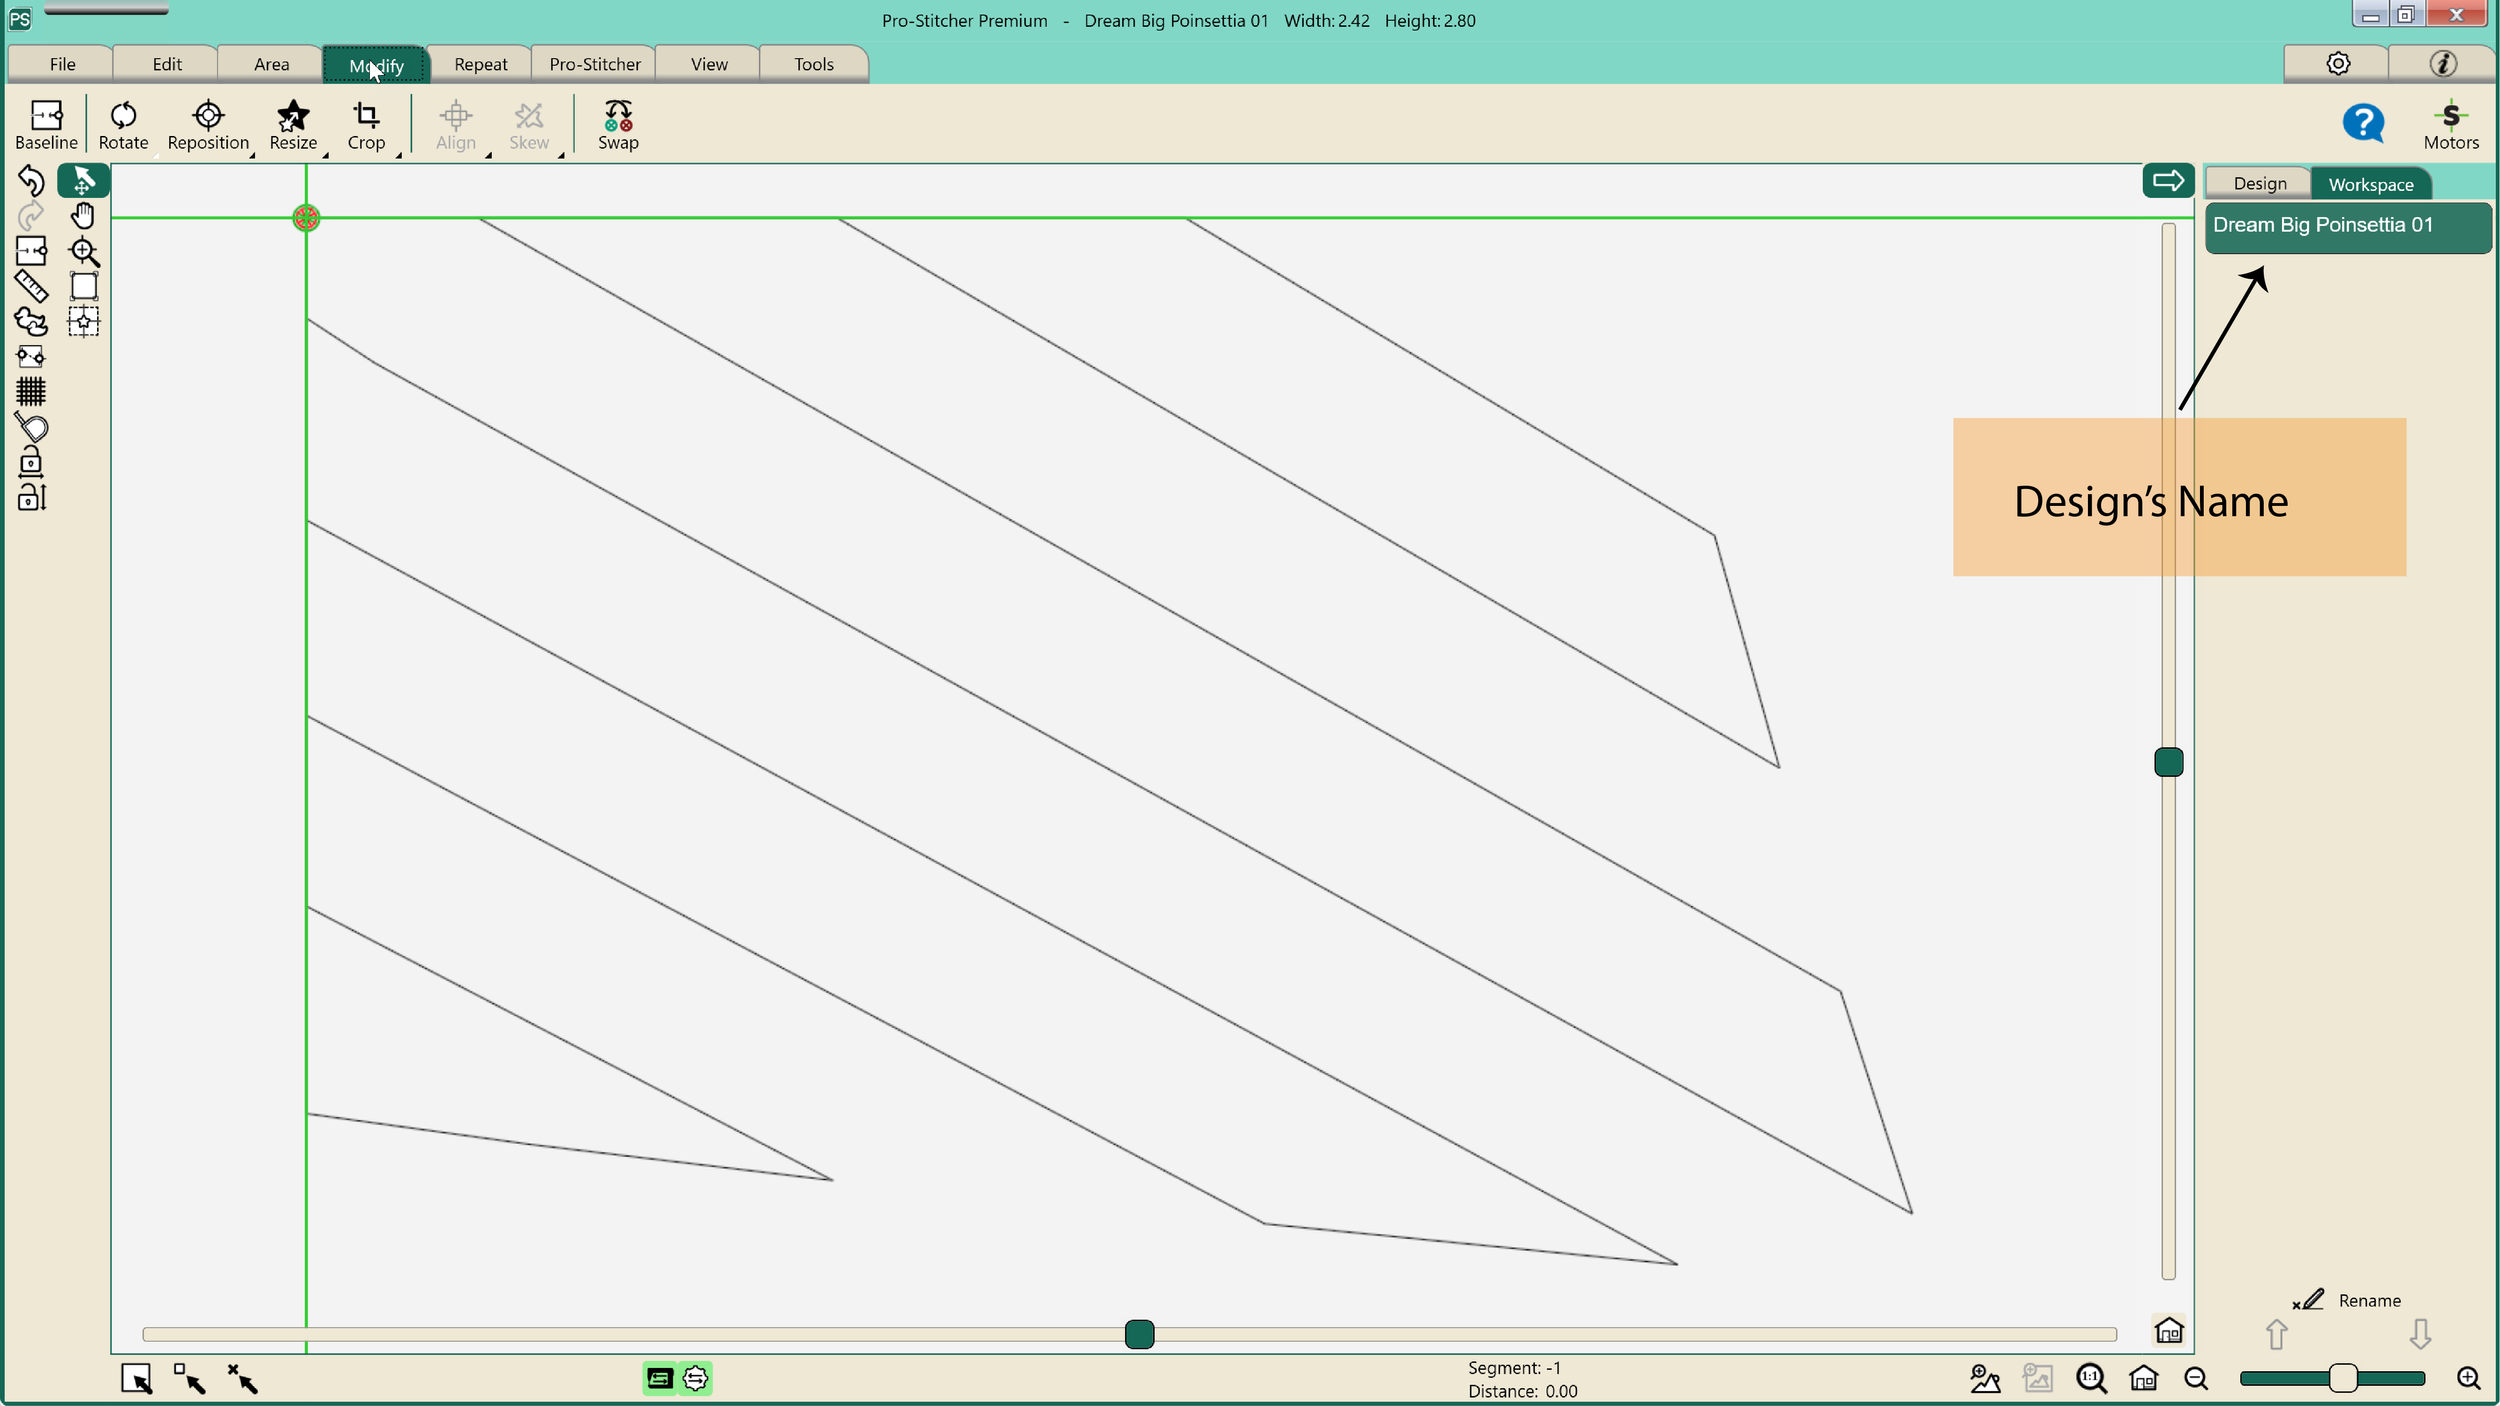
The name of the design appears in “Workspace” on the right side.
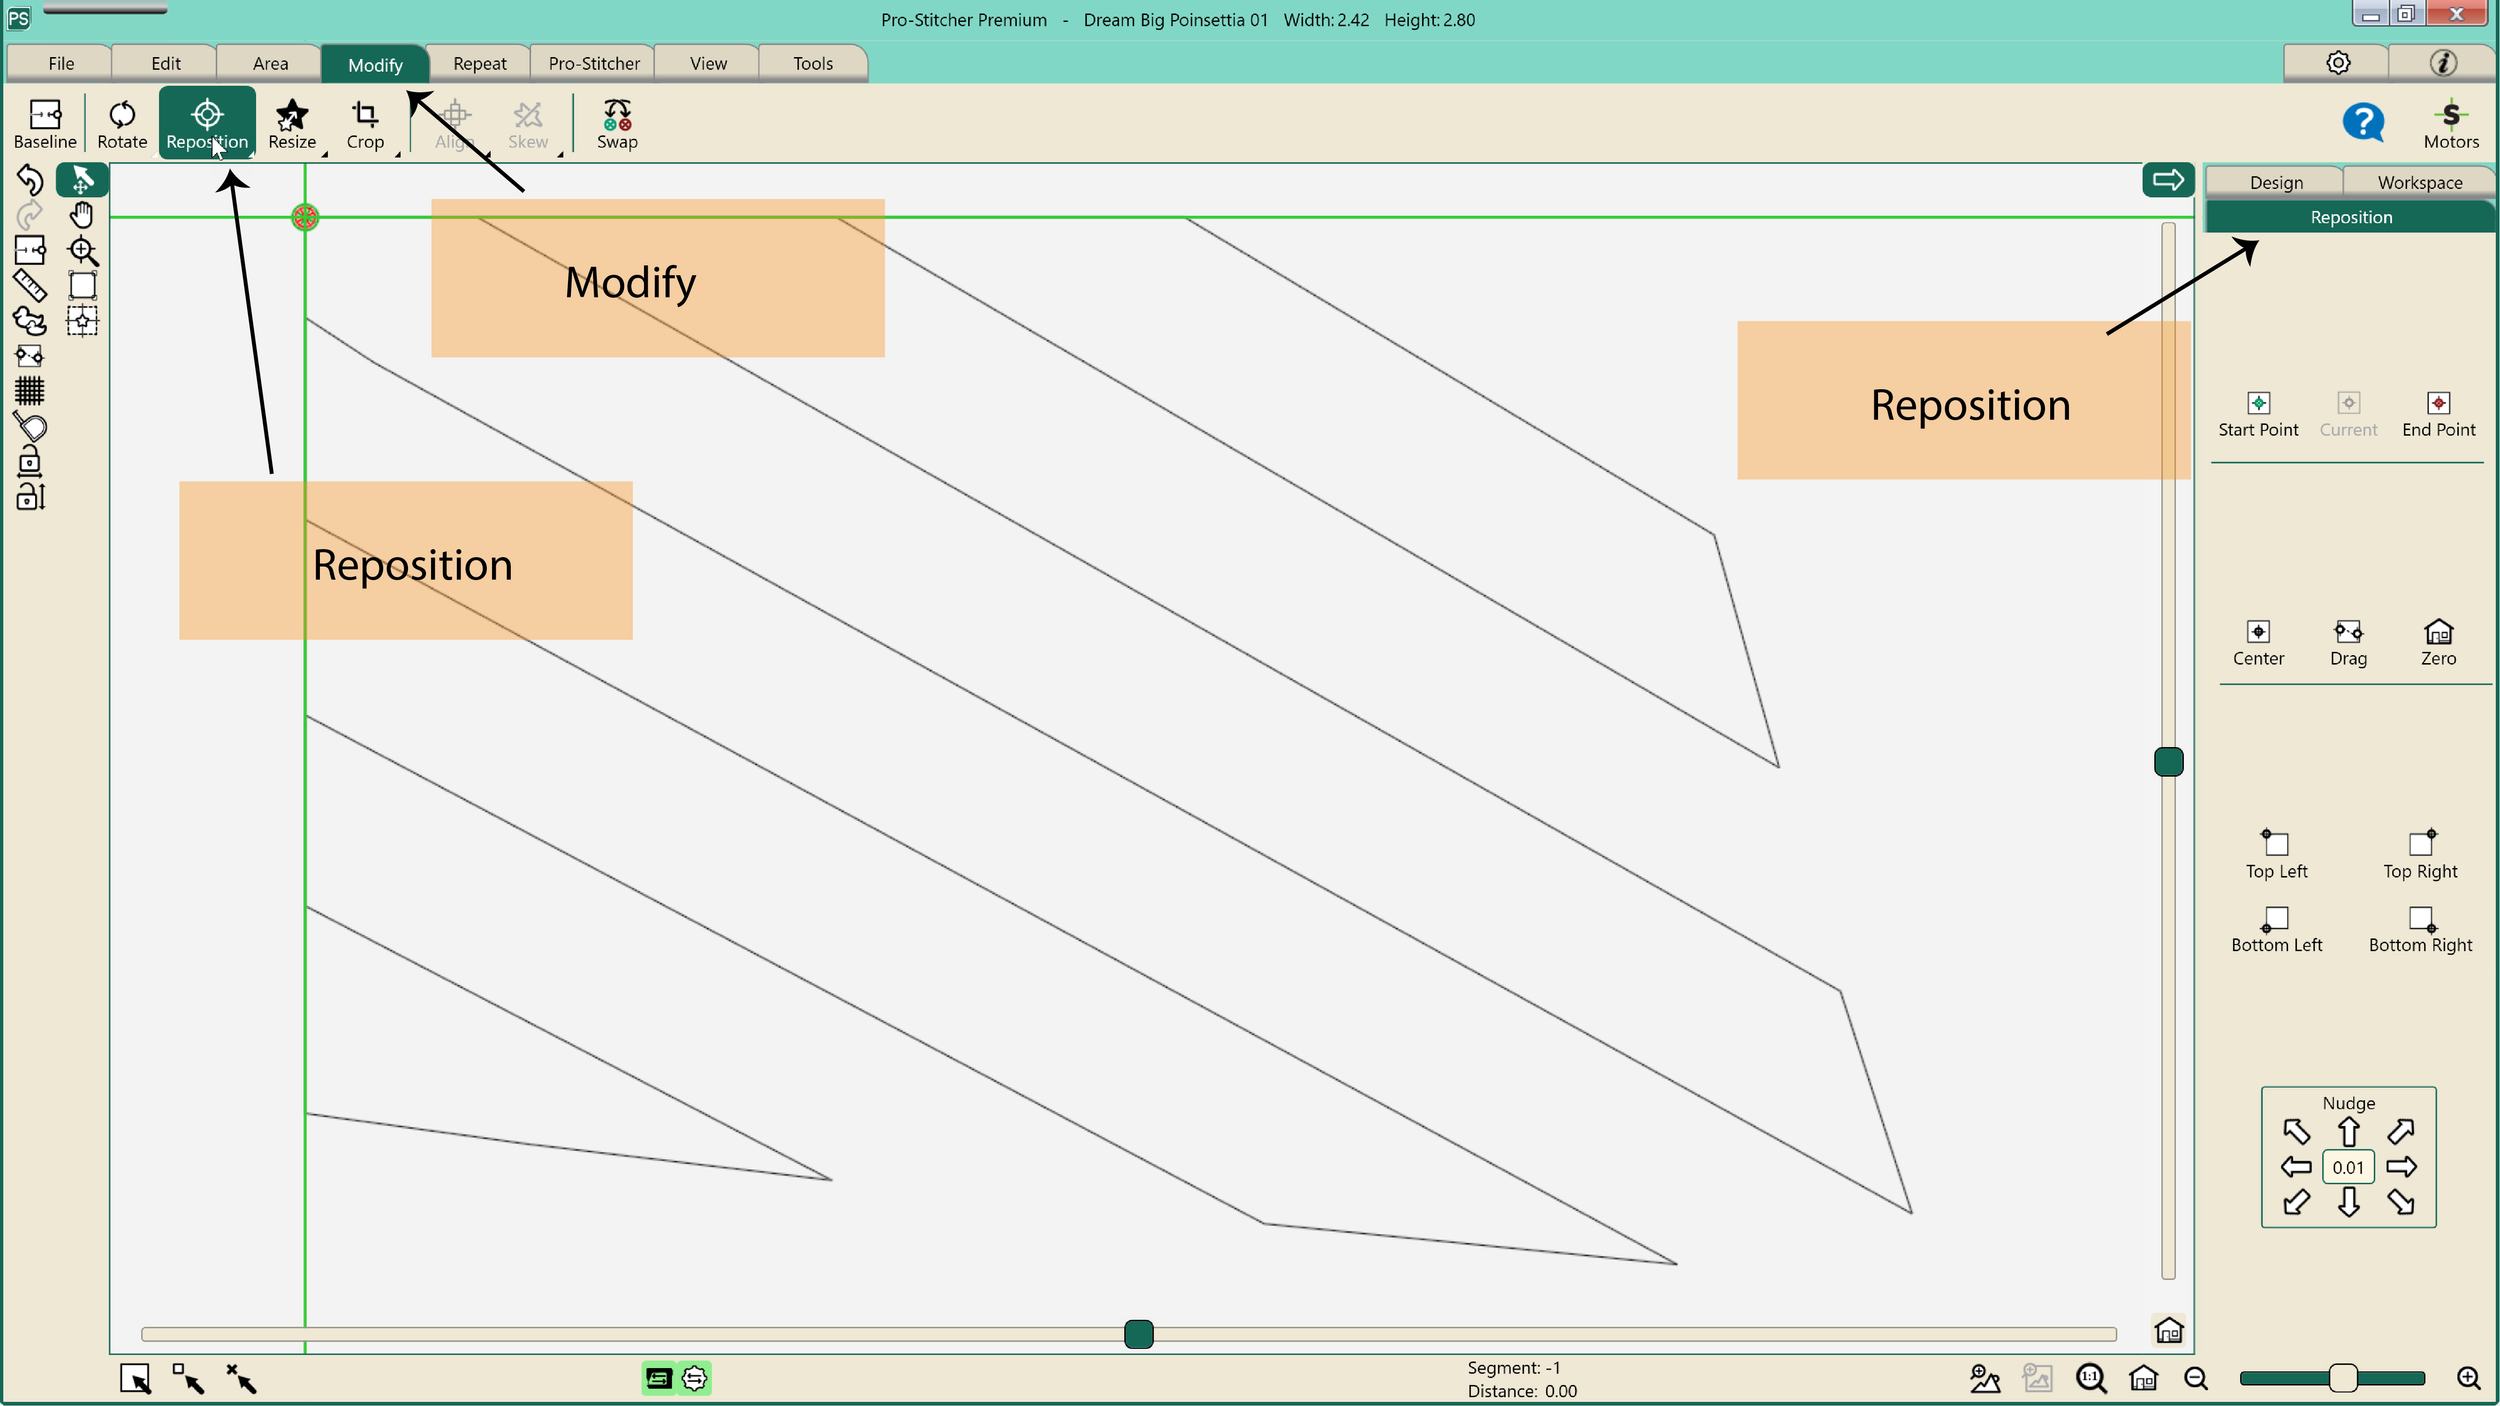
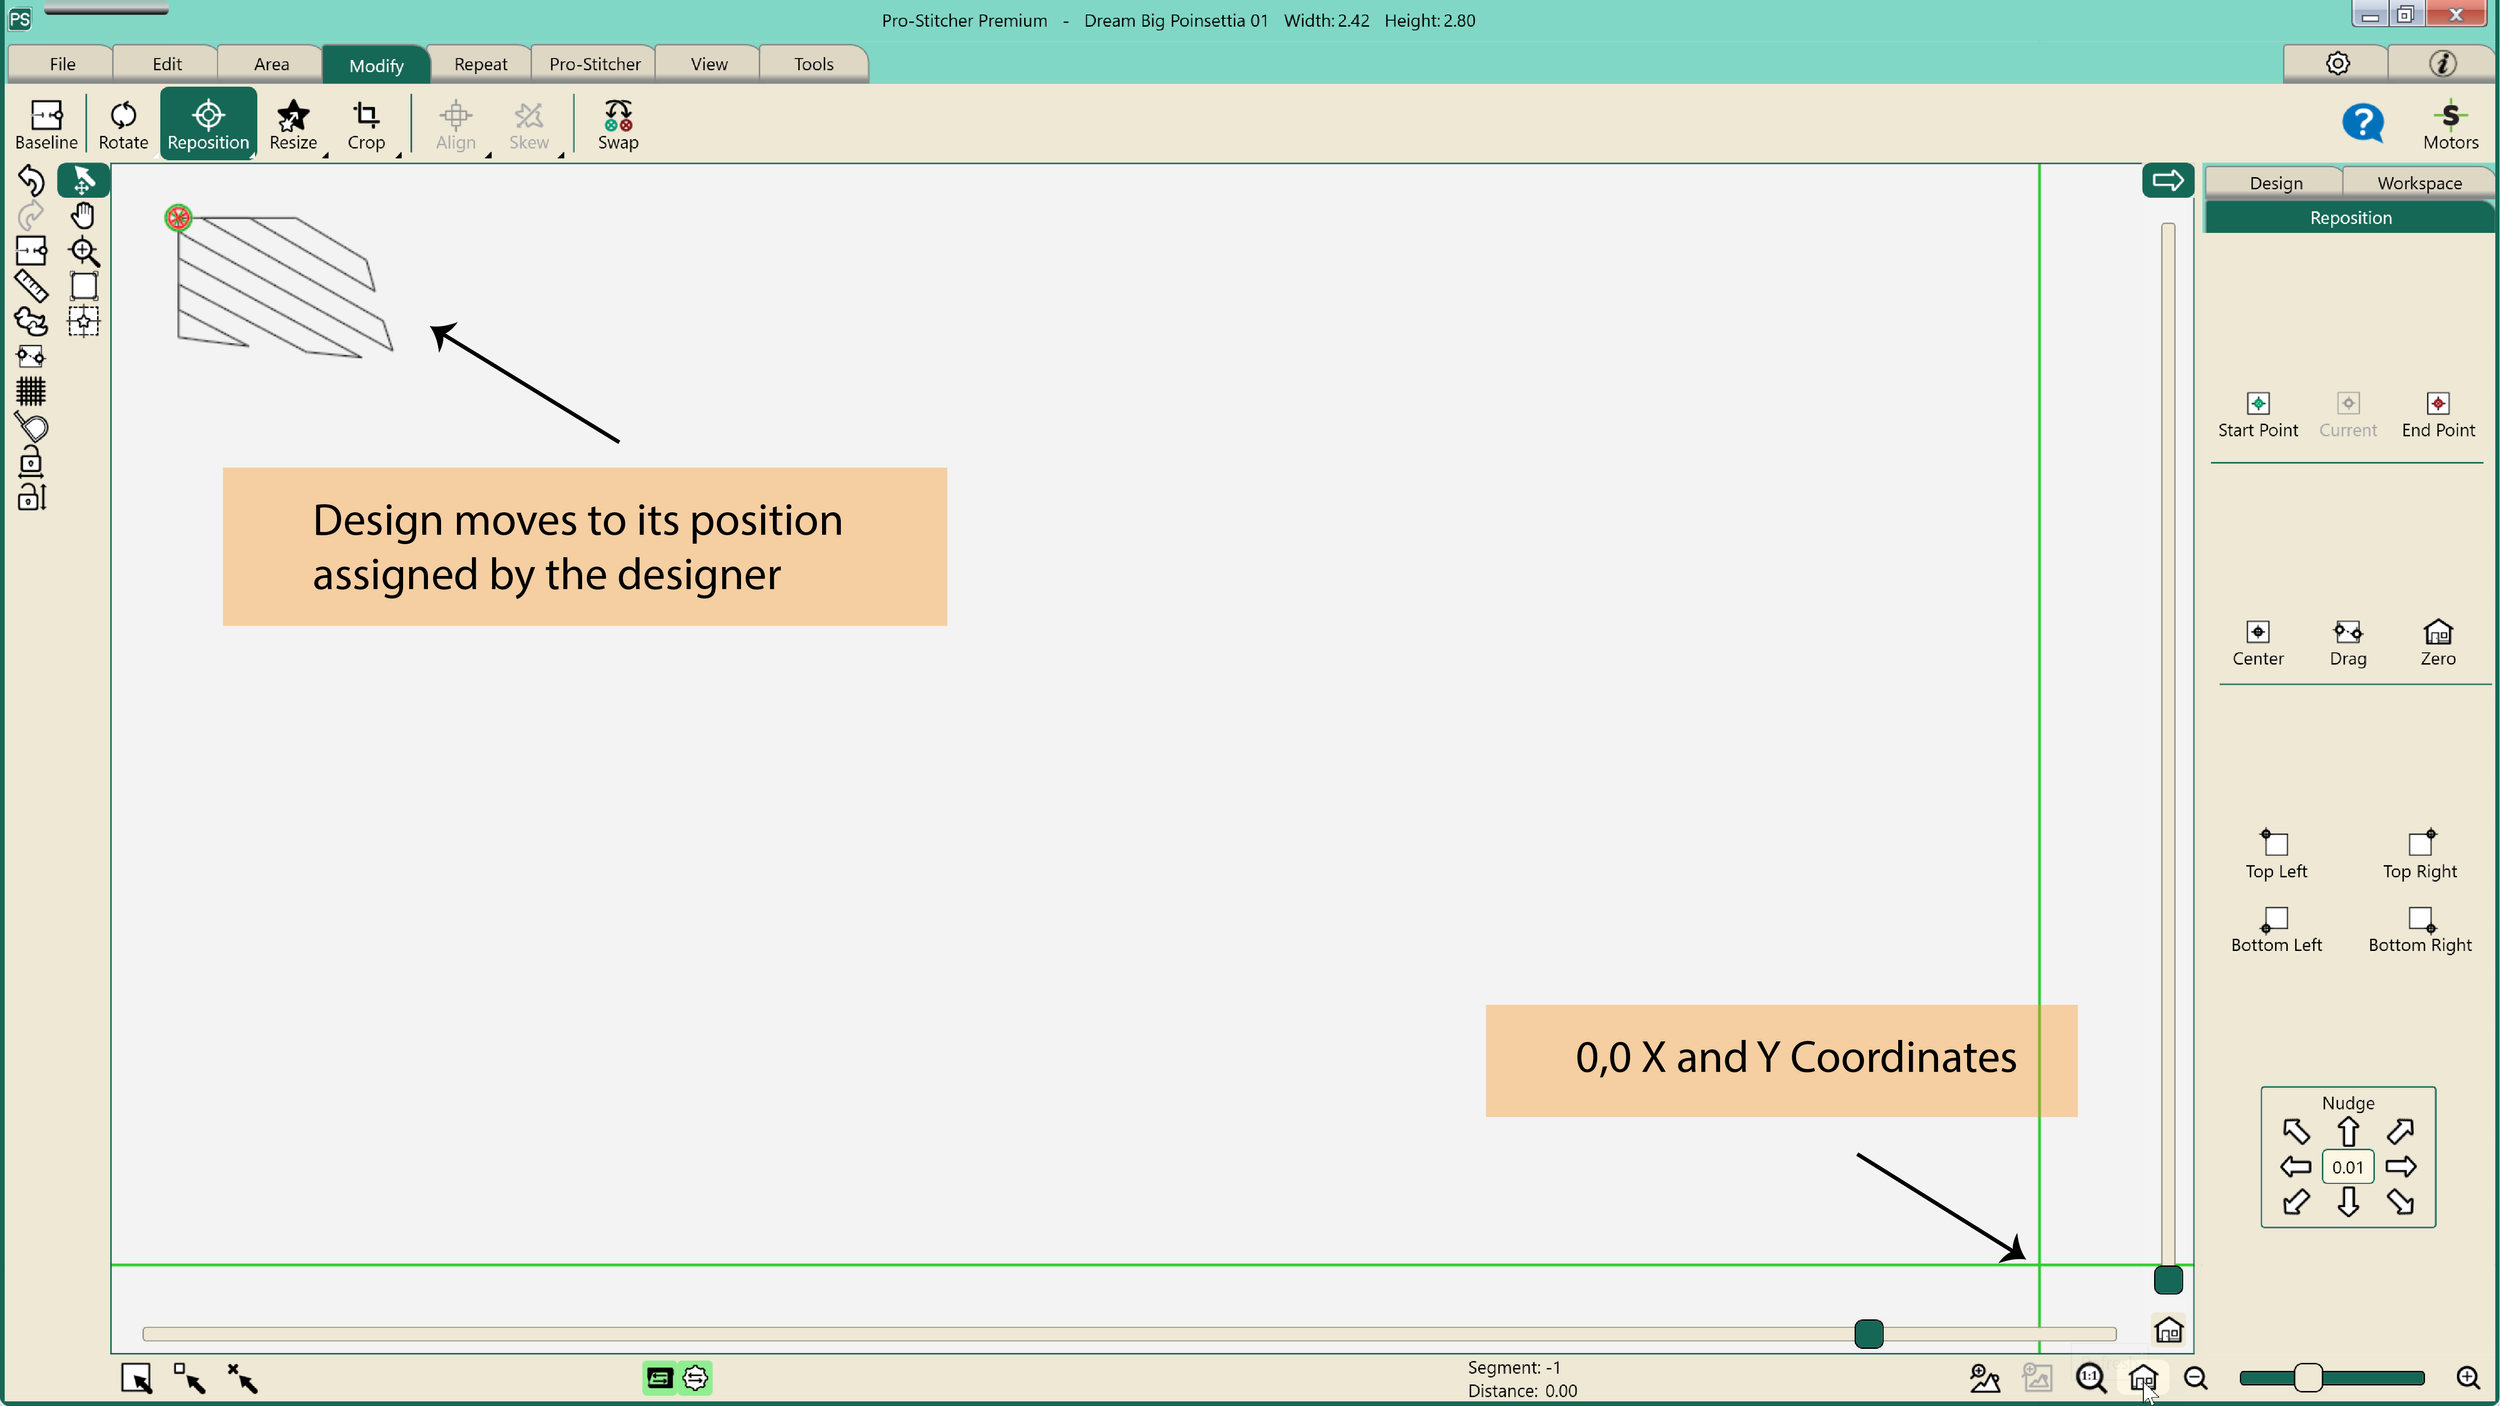
4. Go to the “Modify” tab and click on “Reposition”.
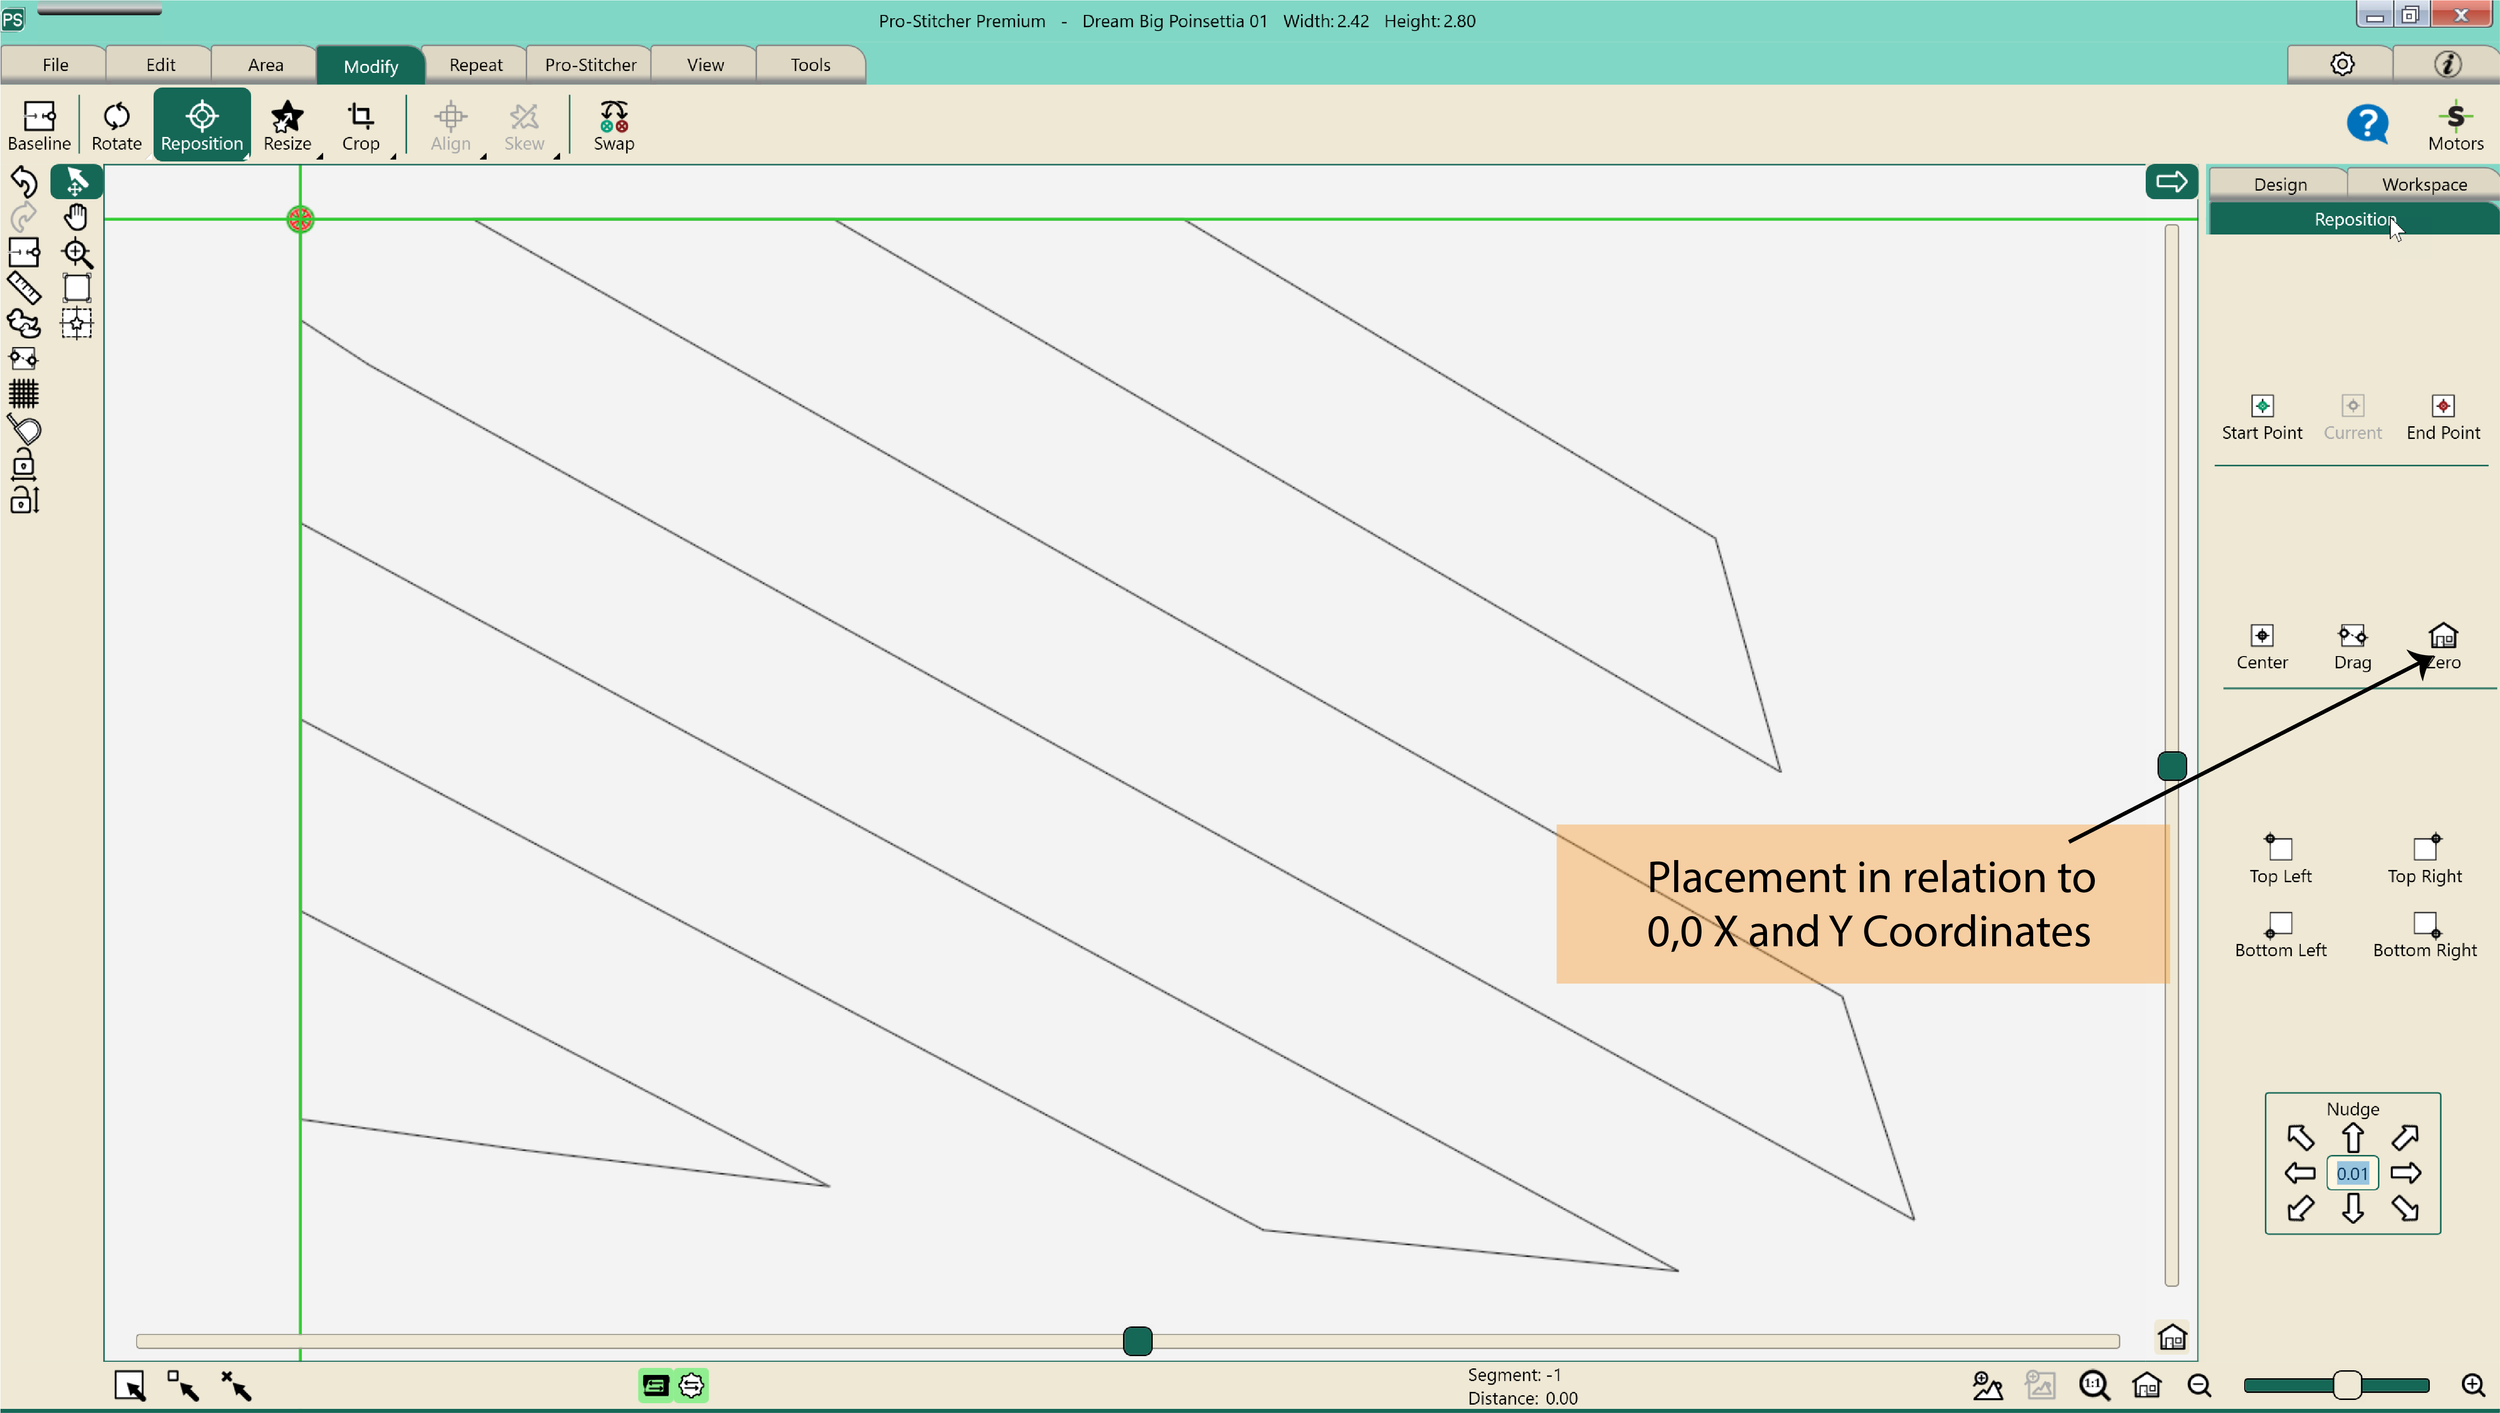
5. Click on “Reposition” in the status bar on the right side. It will show different options for positioning the design. Click “Zero”.
6. The design will move to the position which is assigned to it by the designer on x and y coordinates.
7. Open the next design. Repeat the steps from 02-06.
8. If you cannot see the designs on your screen, press the “Refresh” button on the bottom bar. The icon of the “Refresh” button looks like a house.
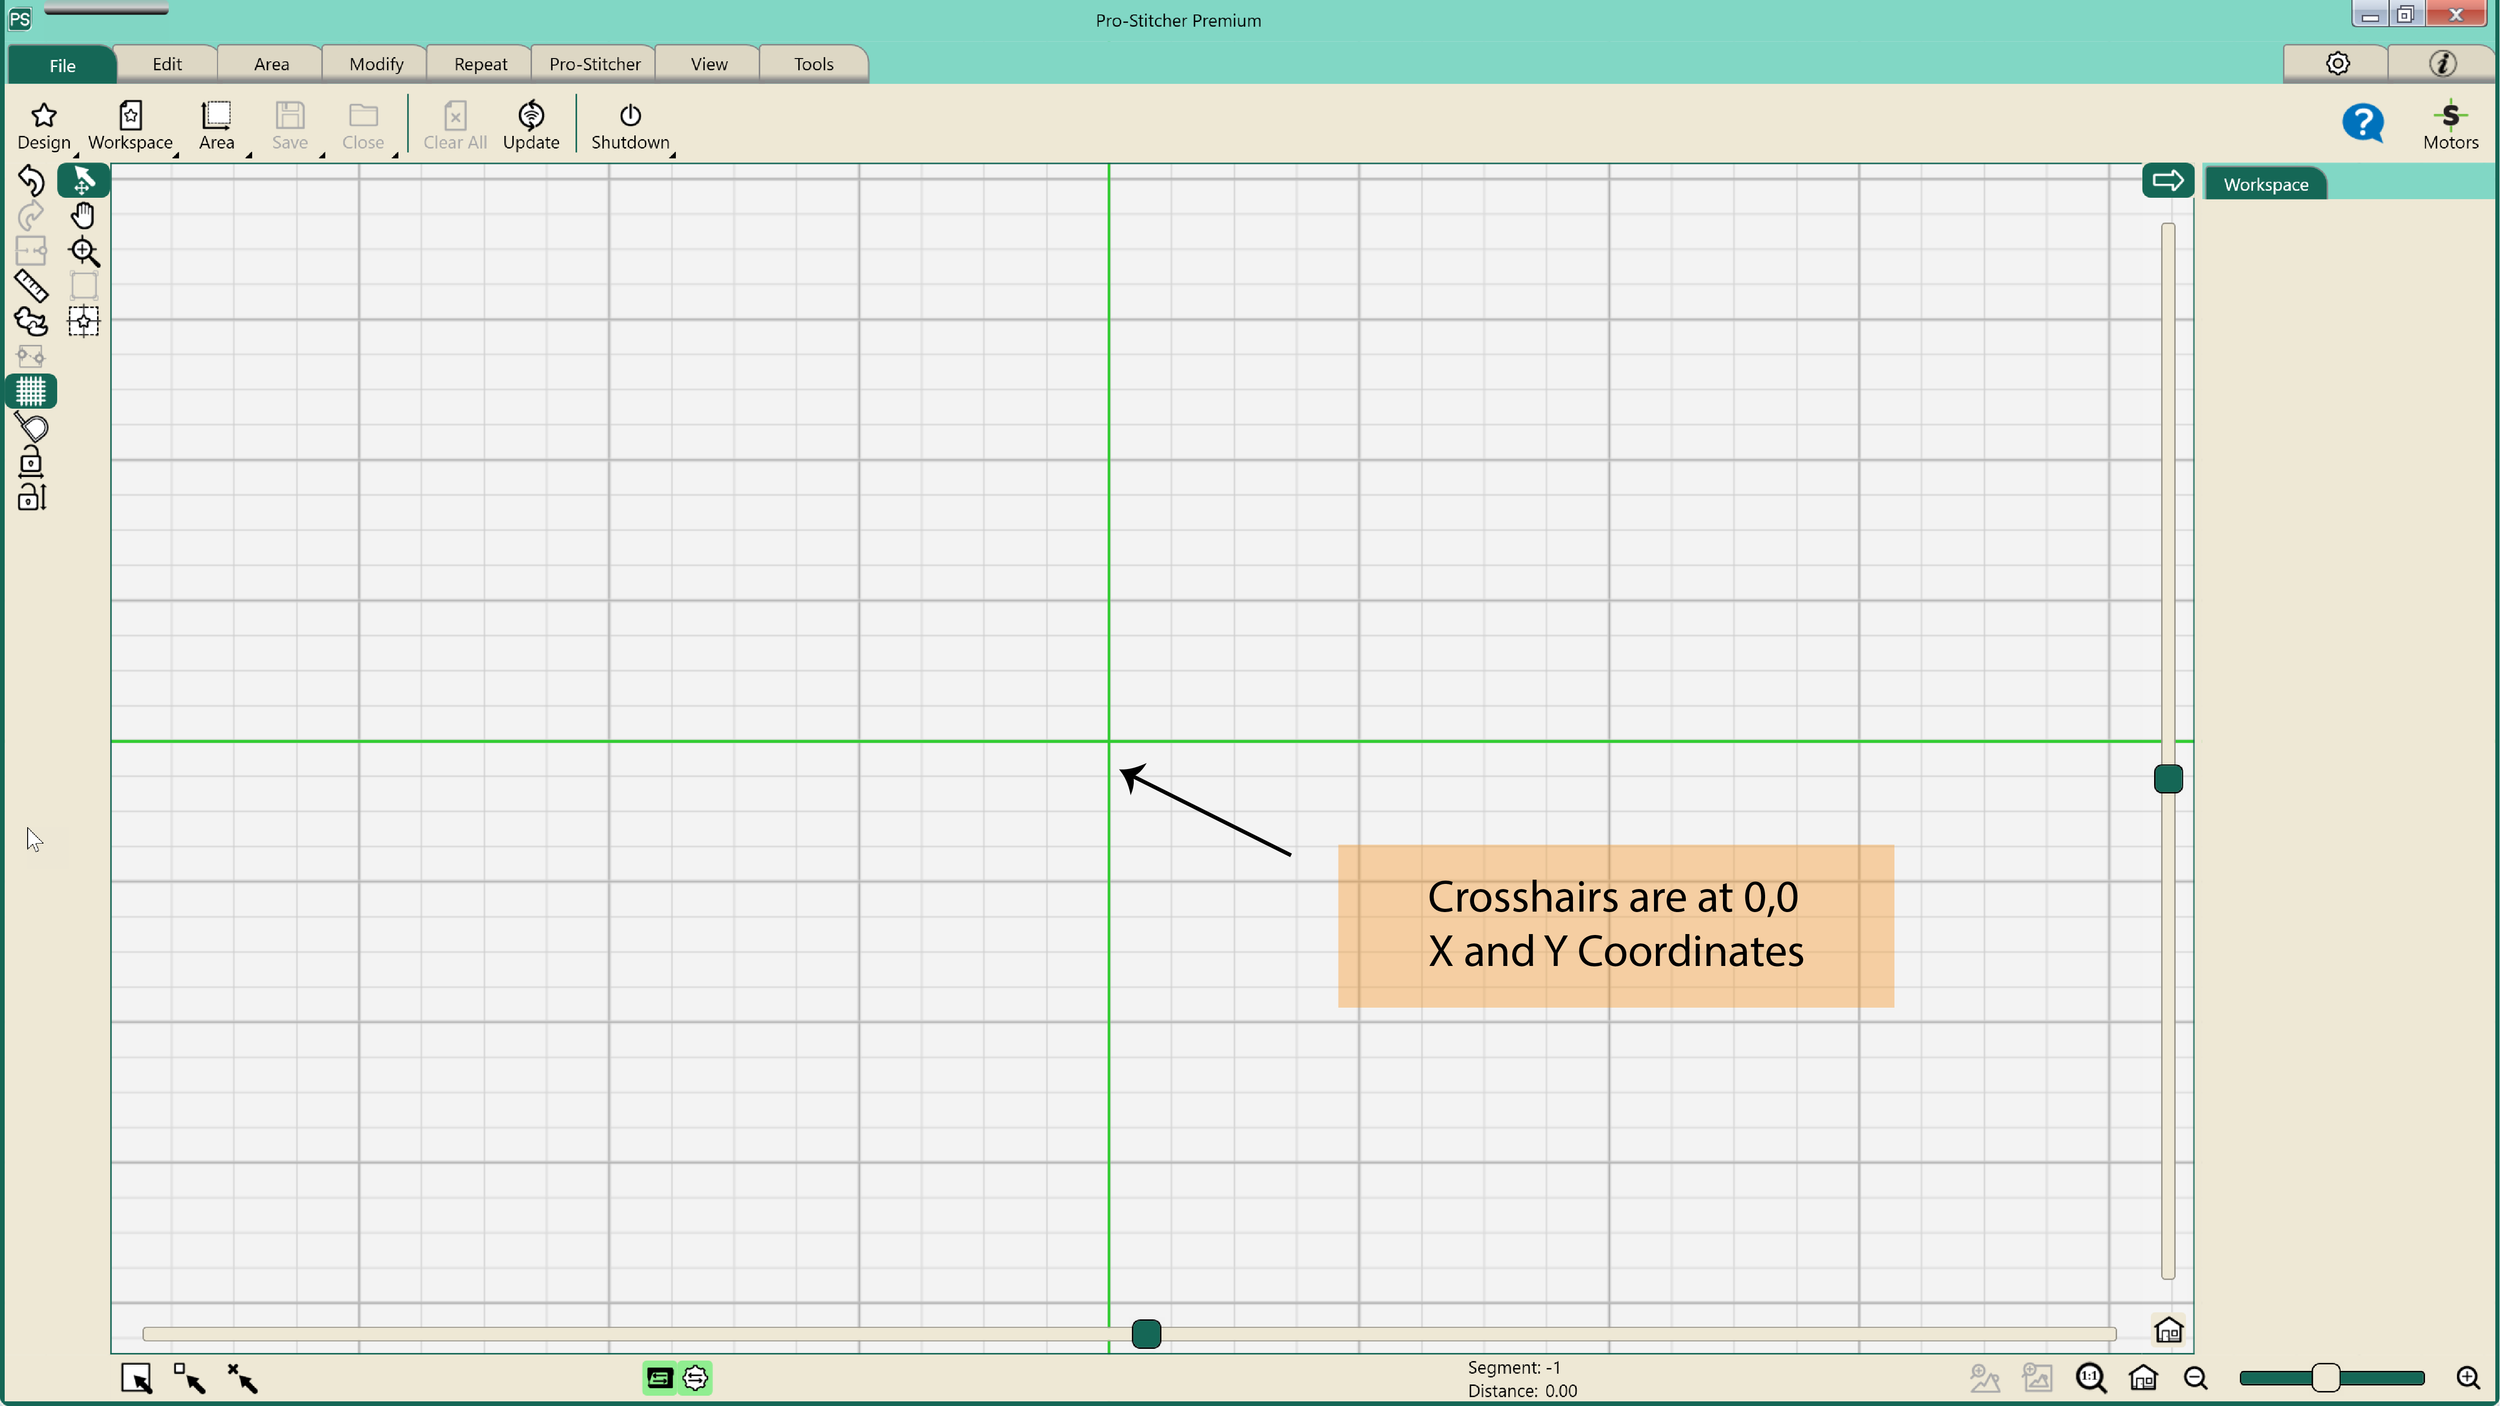
Remember the crosshairs on the screen are at 0,0 on the x and y-axis. The designs are repositioned in relation to this point.
I opened the rest of the designs too. I am using the simulator on my laptop, so I didn’t have any problem opening all the design at once. It is quite possible that opening them all on your tablet might crash the program so I would advise to open designs that will fit in one row.
Notice that all the designs open around the cross hair. They are clustered there, and you cannot differentiate one from another.
I select each design individually. All the open designs are listed in the “Workspace” on the right side.
Go to the “Modify” tab and repeat steps from 04-06. Do this with all the open designs. And voila!
All designs automatically move to the spots they are intended for.
When you are at your machine, create the area, roughly around one row and select all those patterns that fit in that area, quilt at one time! Or you can quilt one design at a time. You might need to nudge pattern minimally to fit in its area.
THE ZERO POINT
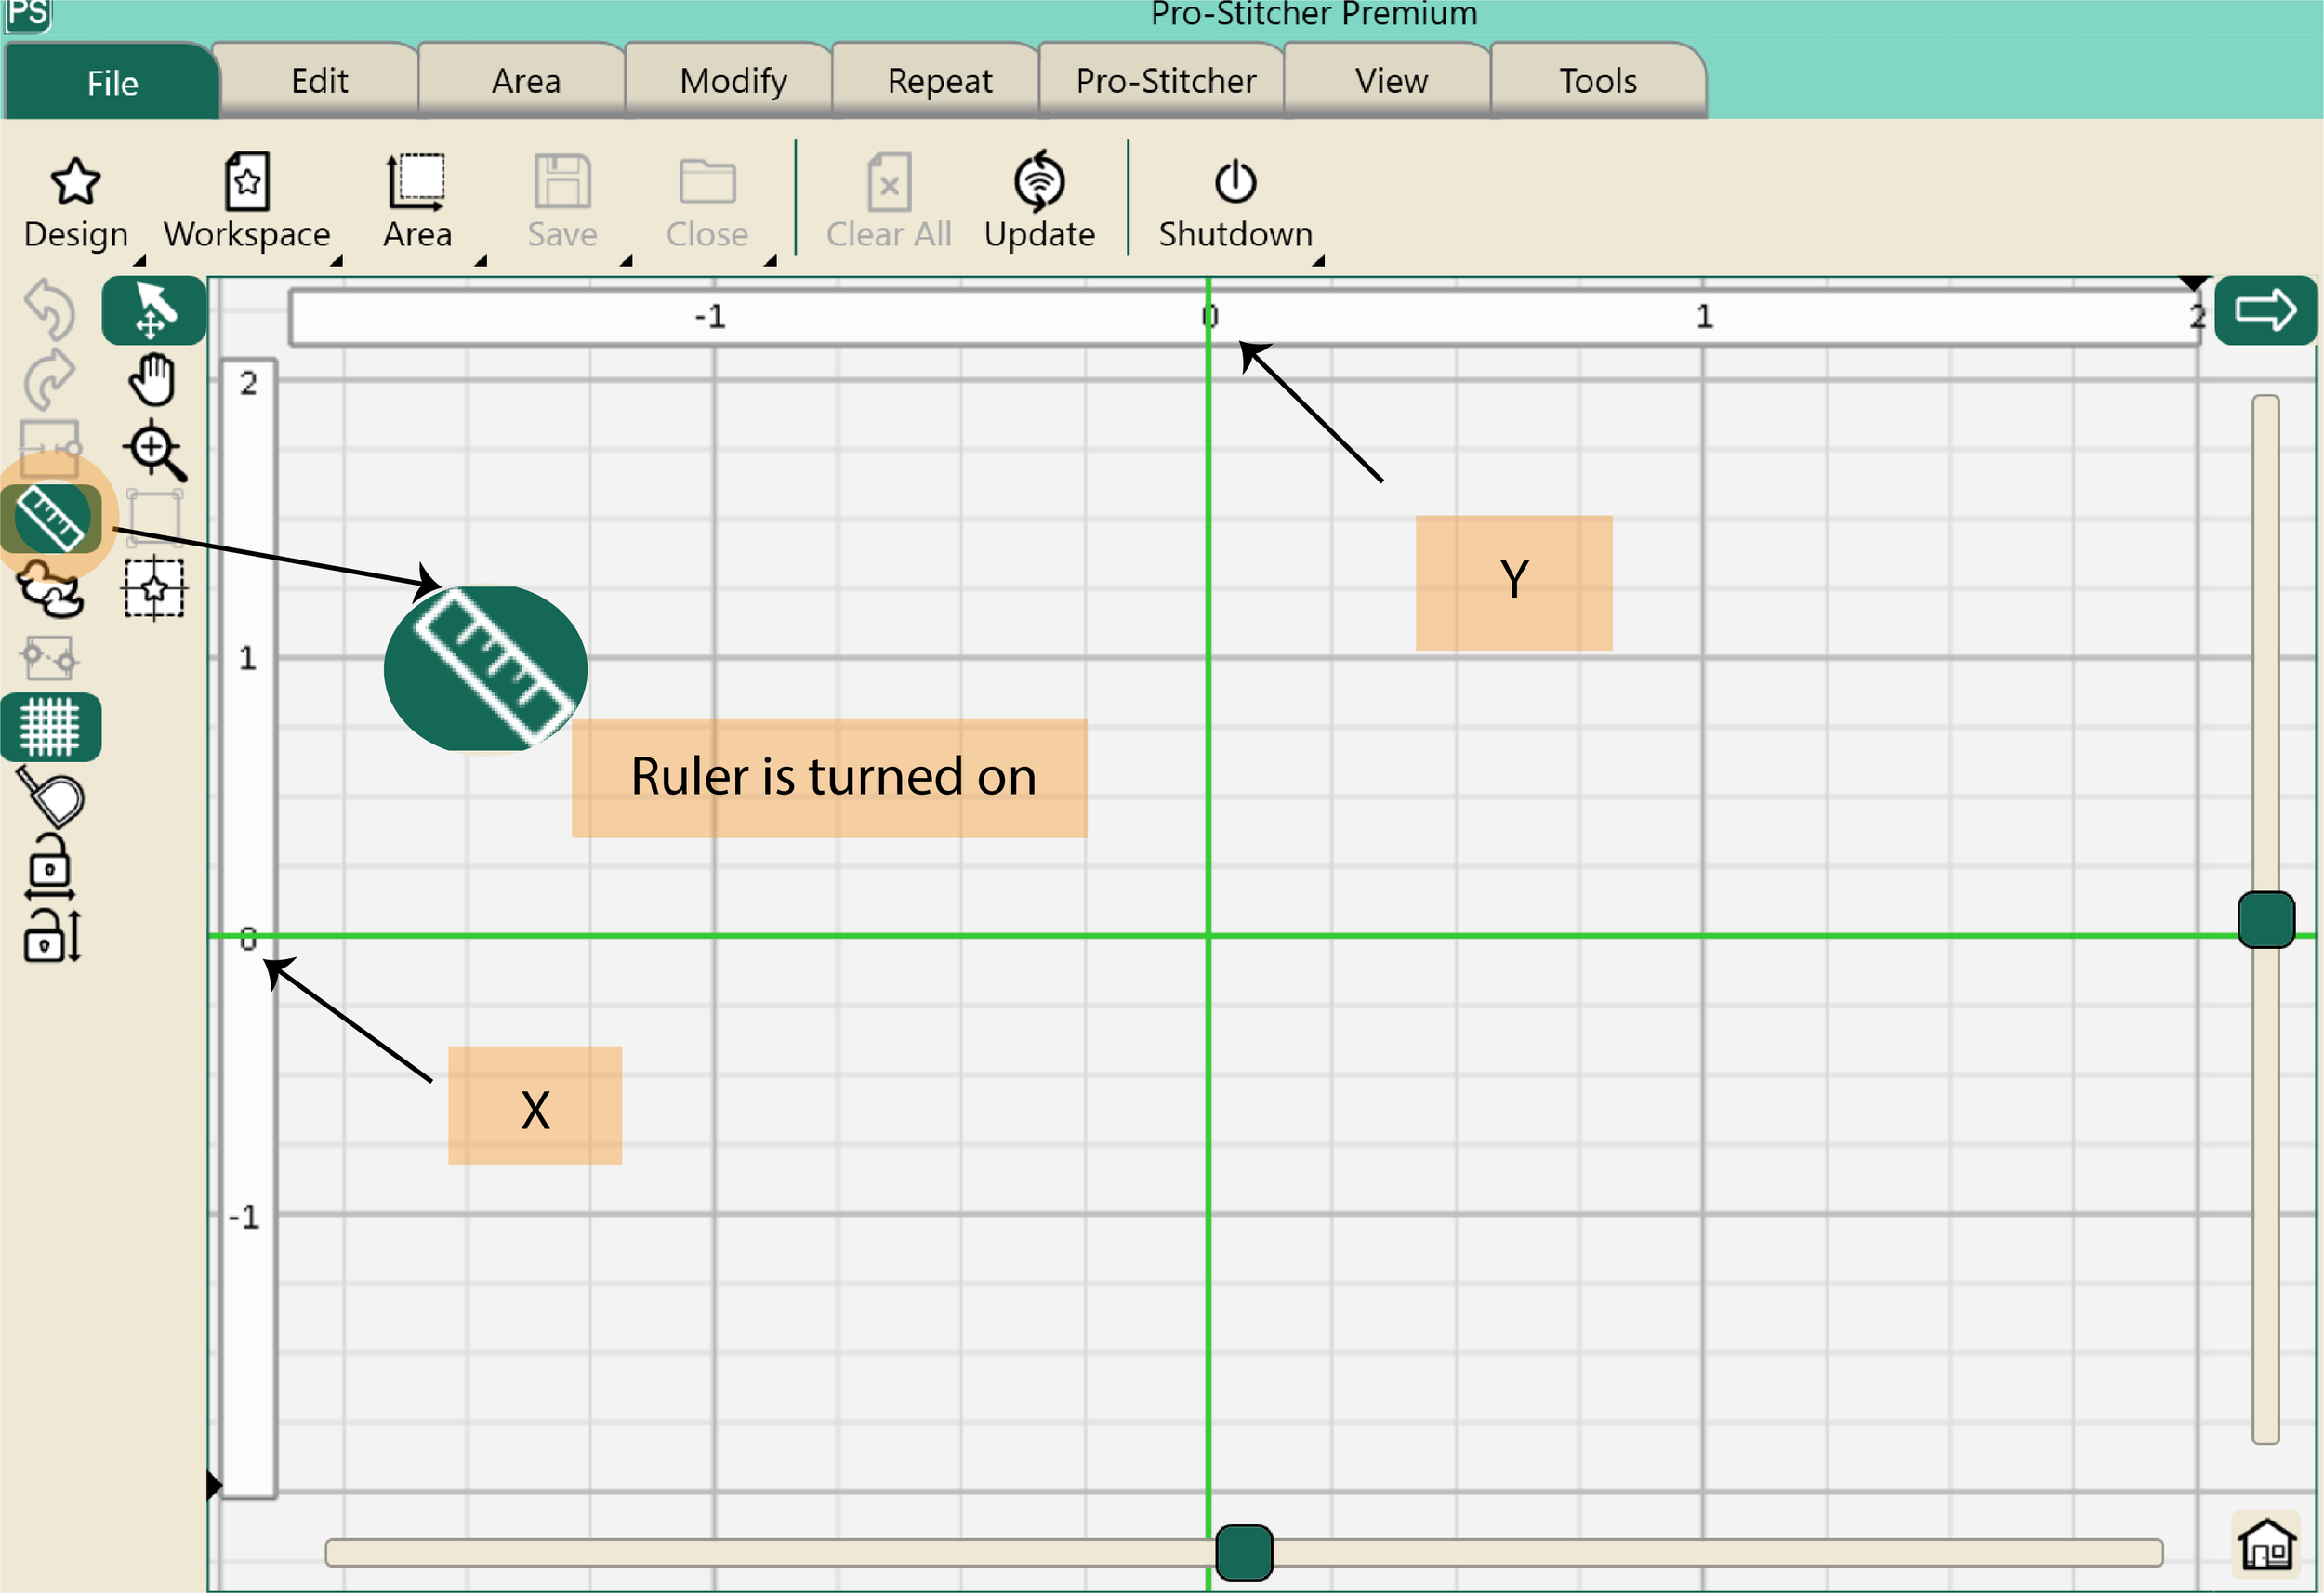
When you turn on the Pro-Stitcher on you machine, the screen shows green lines that cross each other. The point where the lines cross is the “0,0” for the x and y coordinates.
The “zero point” or where the lines cross or the “cross hairs” is where the centre of the needle is. It is not the centre of the design or frame. Click on the ruler to see the numbers for co-ordinates. (Photo 15)
Every time you turn on the Pro-Stitcher on your machine, the crosshairs will be wherever the needle is.
SEGMENT 34 AND THE ZERO POINT
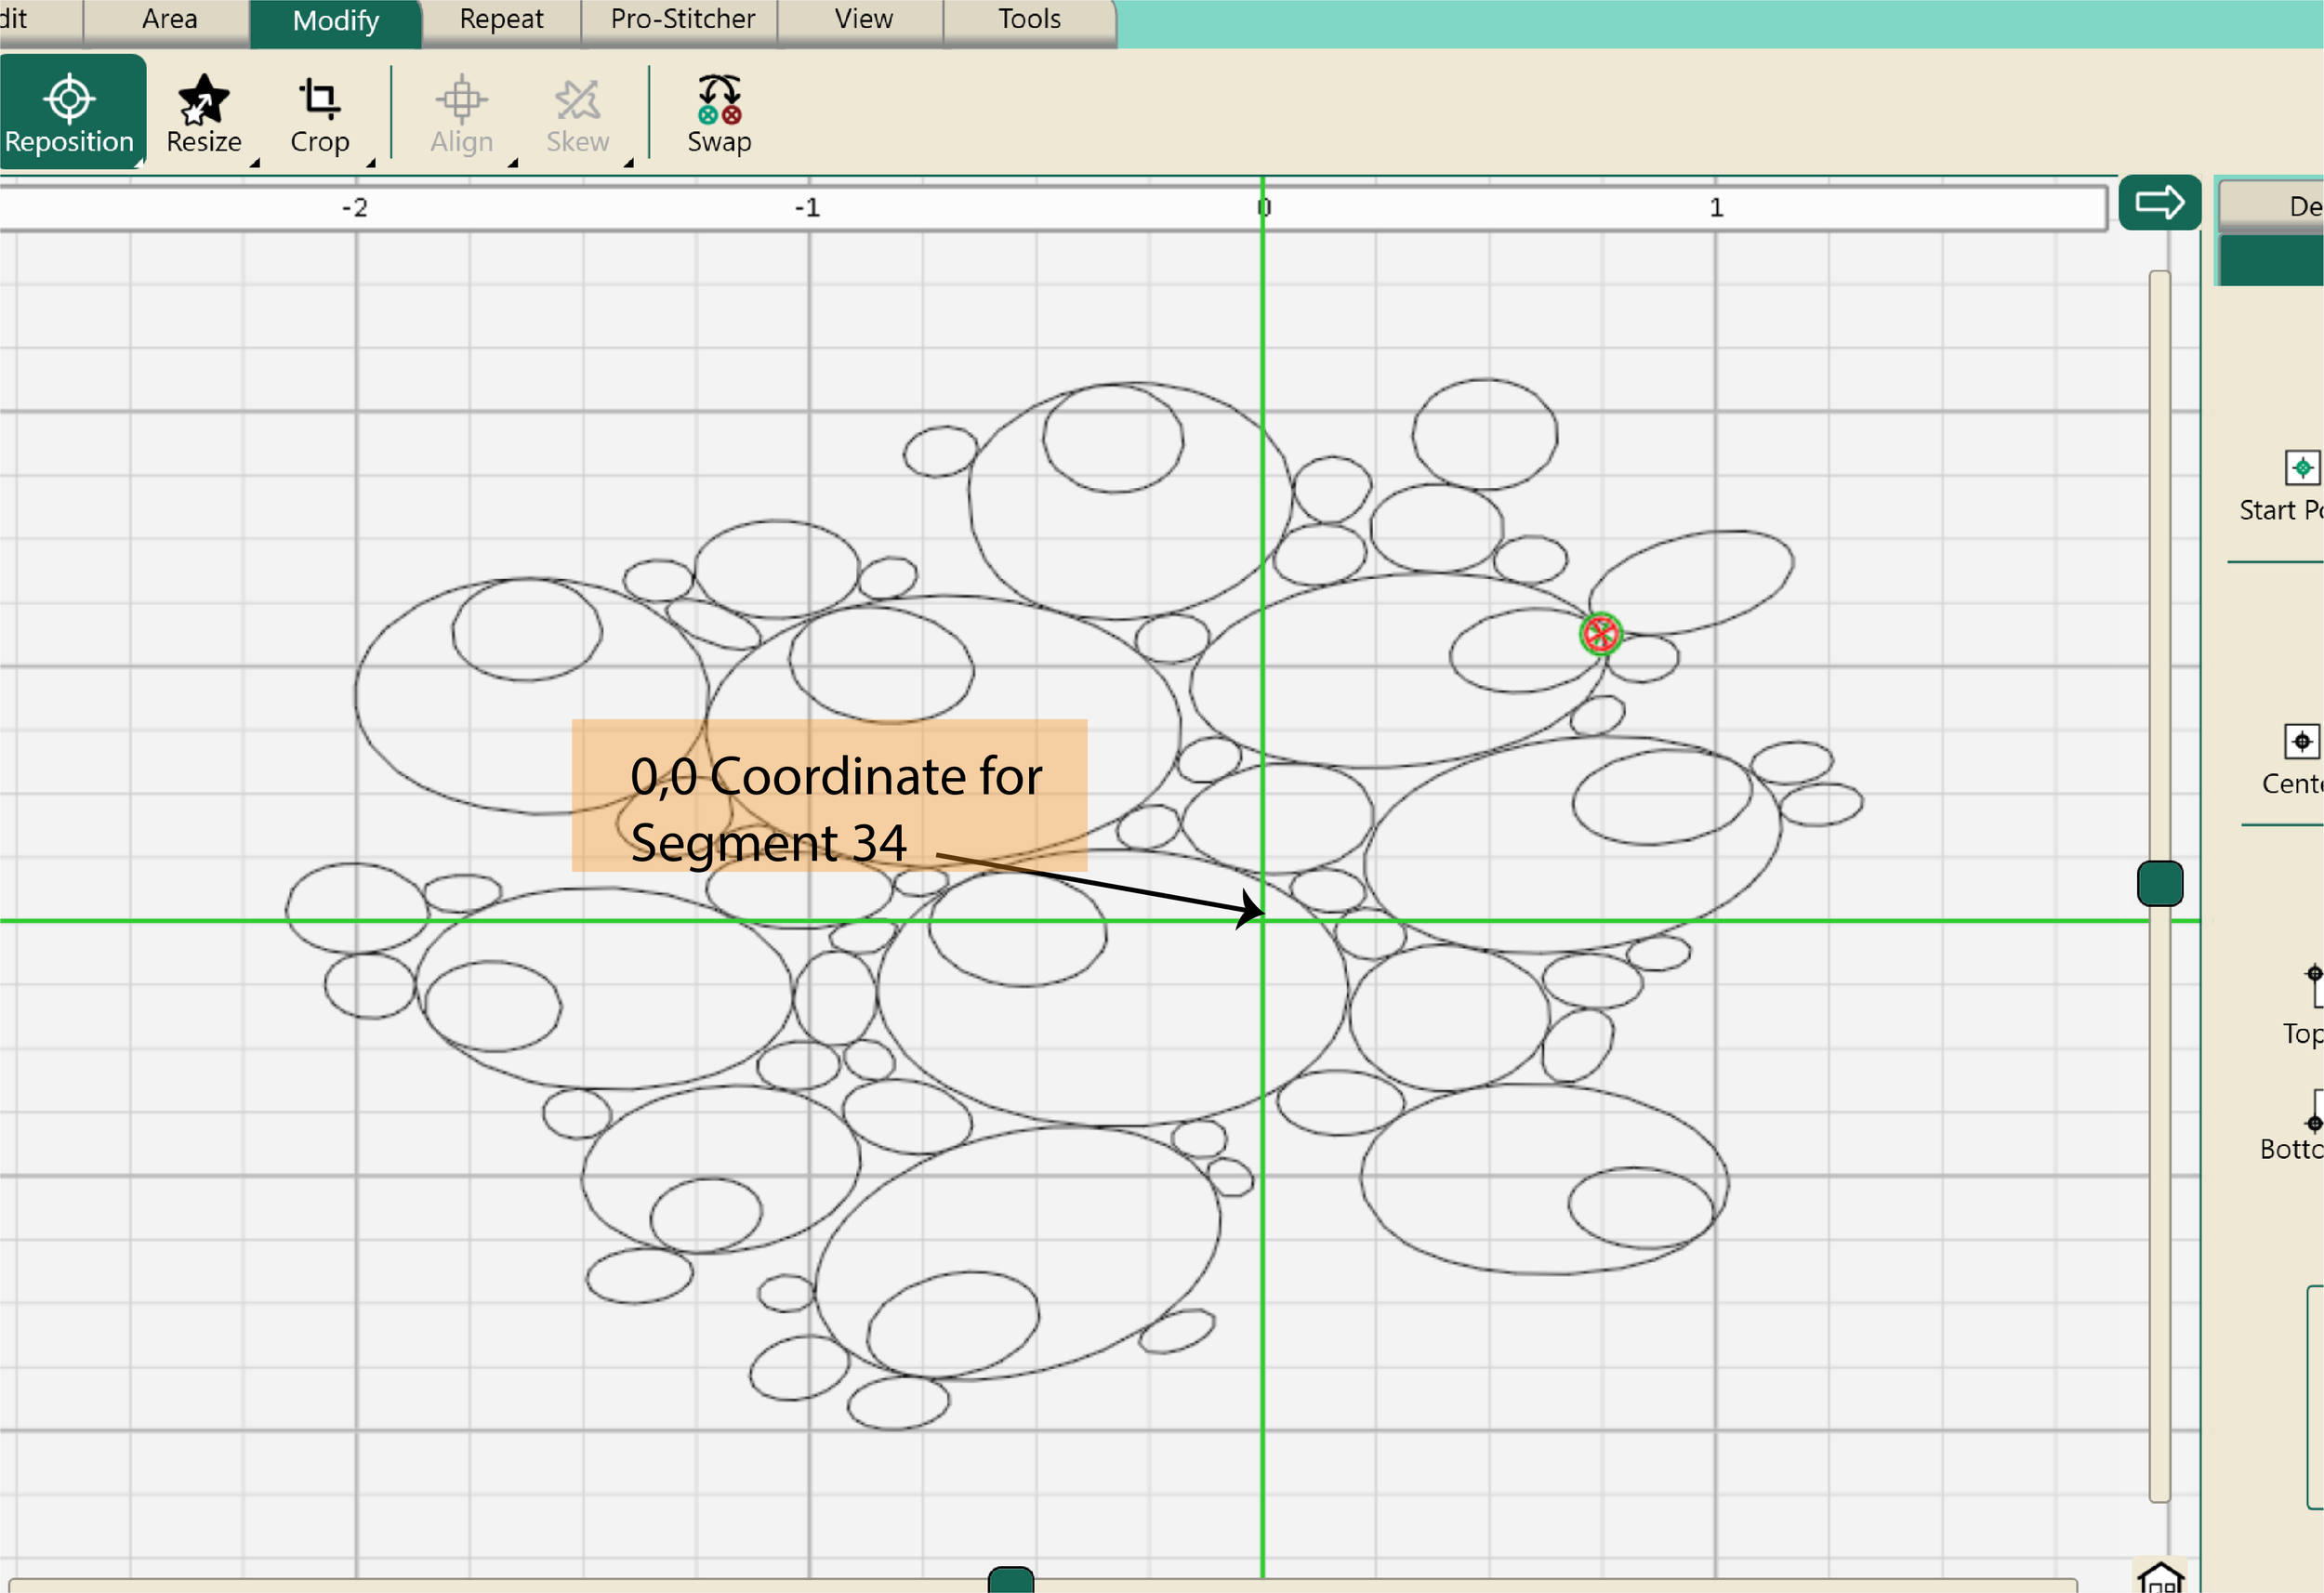
In the Multifarious Poinsettia design, the centre of the poinsettia is the segment 34. It is in the center of the panel. Try to move the center of the needle to the center of that part on the panel. Notice that I set the 0,0 at the center of the panel and not on the center of the design.
Move your machine to the centre of the panel and then power it on with the Pro-Stitcher This will help line up all the segments
Thank you Kimberly Flannagan for the advice to add this part to the document.
Enjoy Quilting !! what you want to learn next? let me know.
Download this blog in PDF by clicking here.

